
Train Components
Last updated: 8 Jul 2026
Training enables the machine to recognize component characteristics, ensuring accurate placement during production runs. Each component requires training only once. This information is saved within the “Components Library” for future use.
The following steps detail the process of training a new component.
Initial Preparations
Load the component into the machine using an automatic feeder, manual feeder, or tray feeder.
It is recommended to keep the machine lid closed during training to maintain consistent lighting conditions.
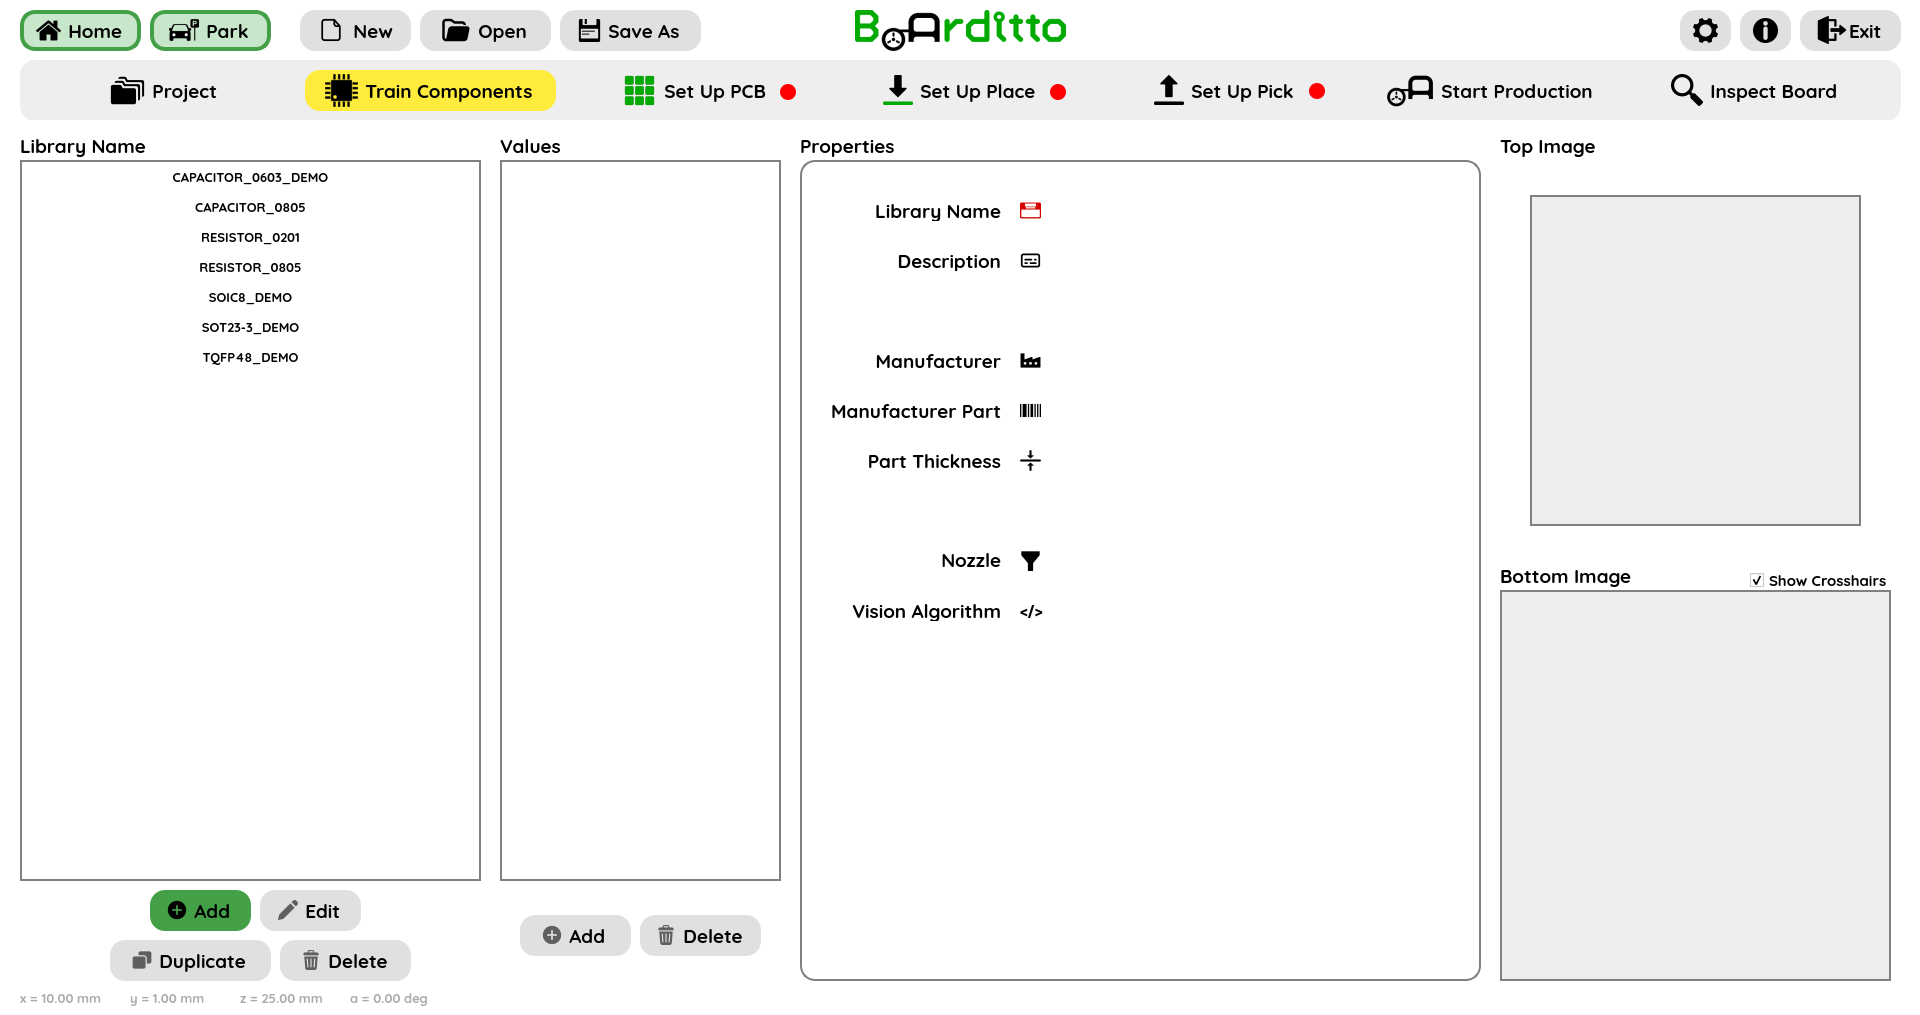
Navigate to the “Train Components” tab and click “Add” below the “Library Name” area.
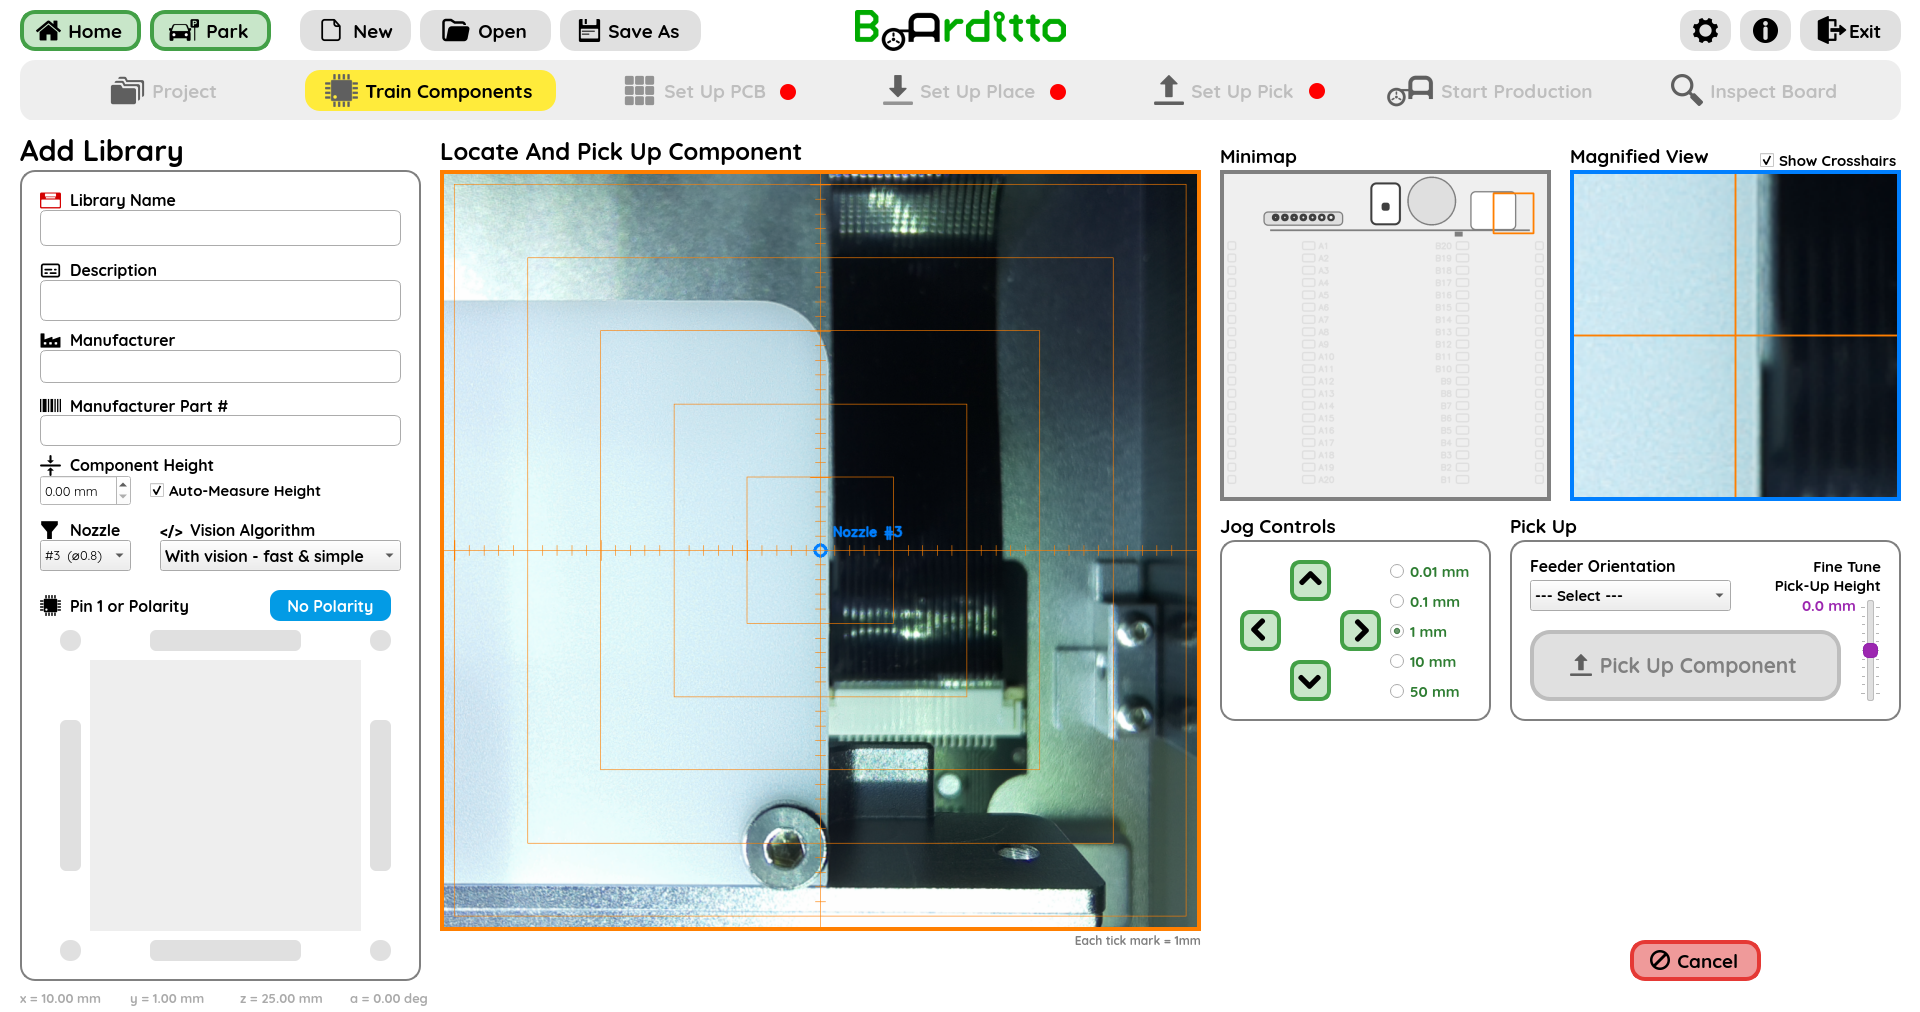
Basic Component Information
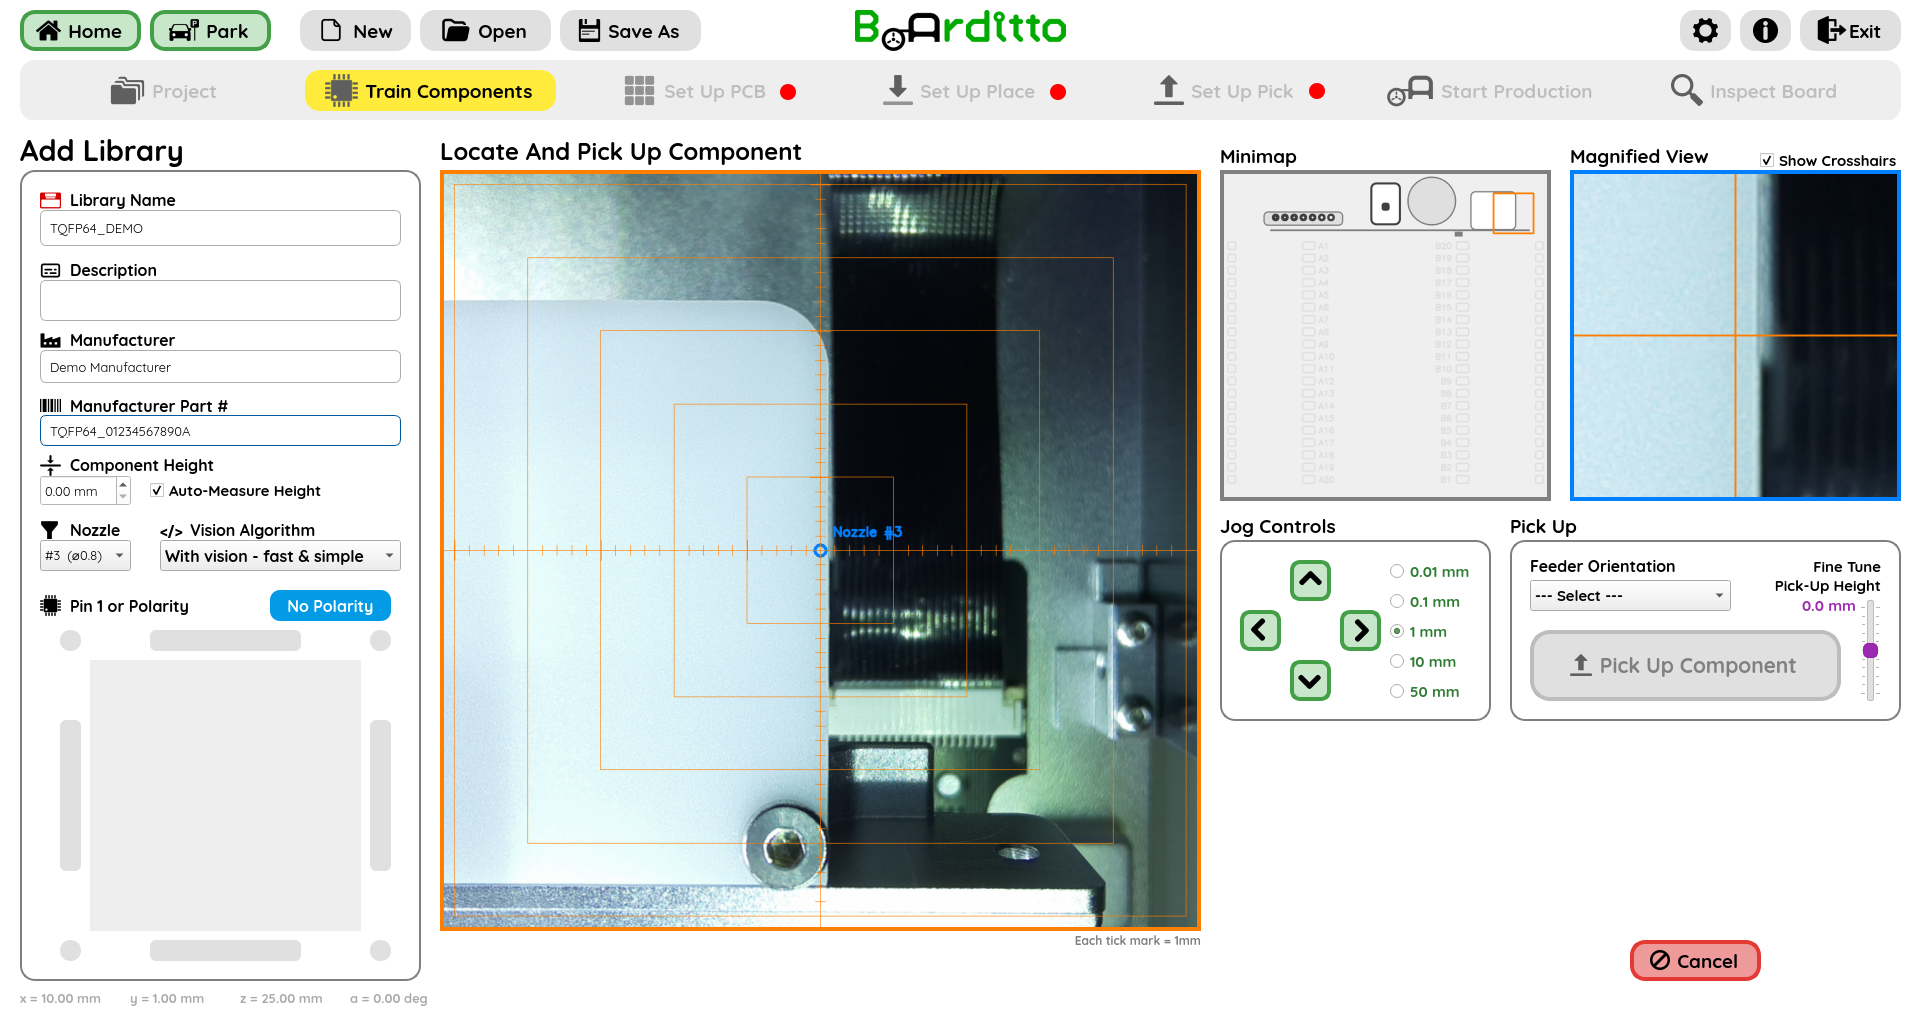
This section allows input of basic component information:
• Library Name (required)
• Description (optional)
• Manufacturer (optional)
• Manufacturer Part Number (optional)
The Library Name should be chosen carefully since it will be directly used as the unique ID of the library and will be tedious to change later on as more jobs link to and use the library.
The optional fields are not required to be able to pick and place a component, but are there for the user to remain organized as the number of libraries grows over time.
Component Height
Component height can be determined in two ways:
• Automated Measurement: Check the “Auto-measure height” box to allow the machine to measure it automatically.
• Manual Input: Obtain the height from the component’s datasheet and enter it directly.
Component Location
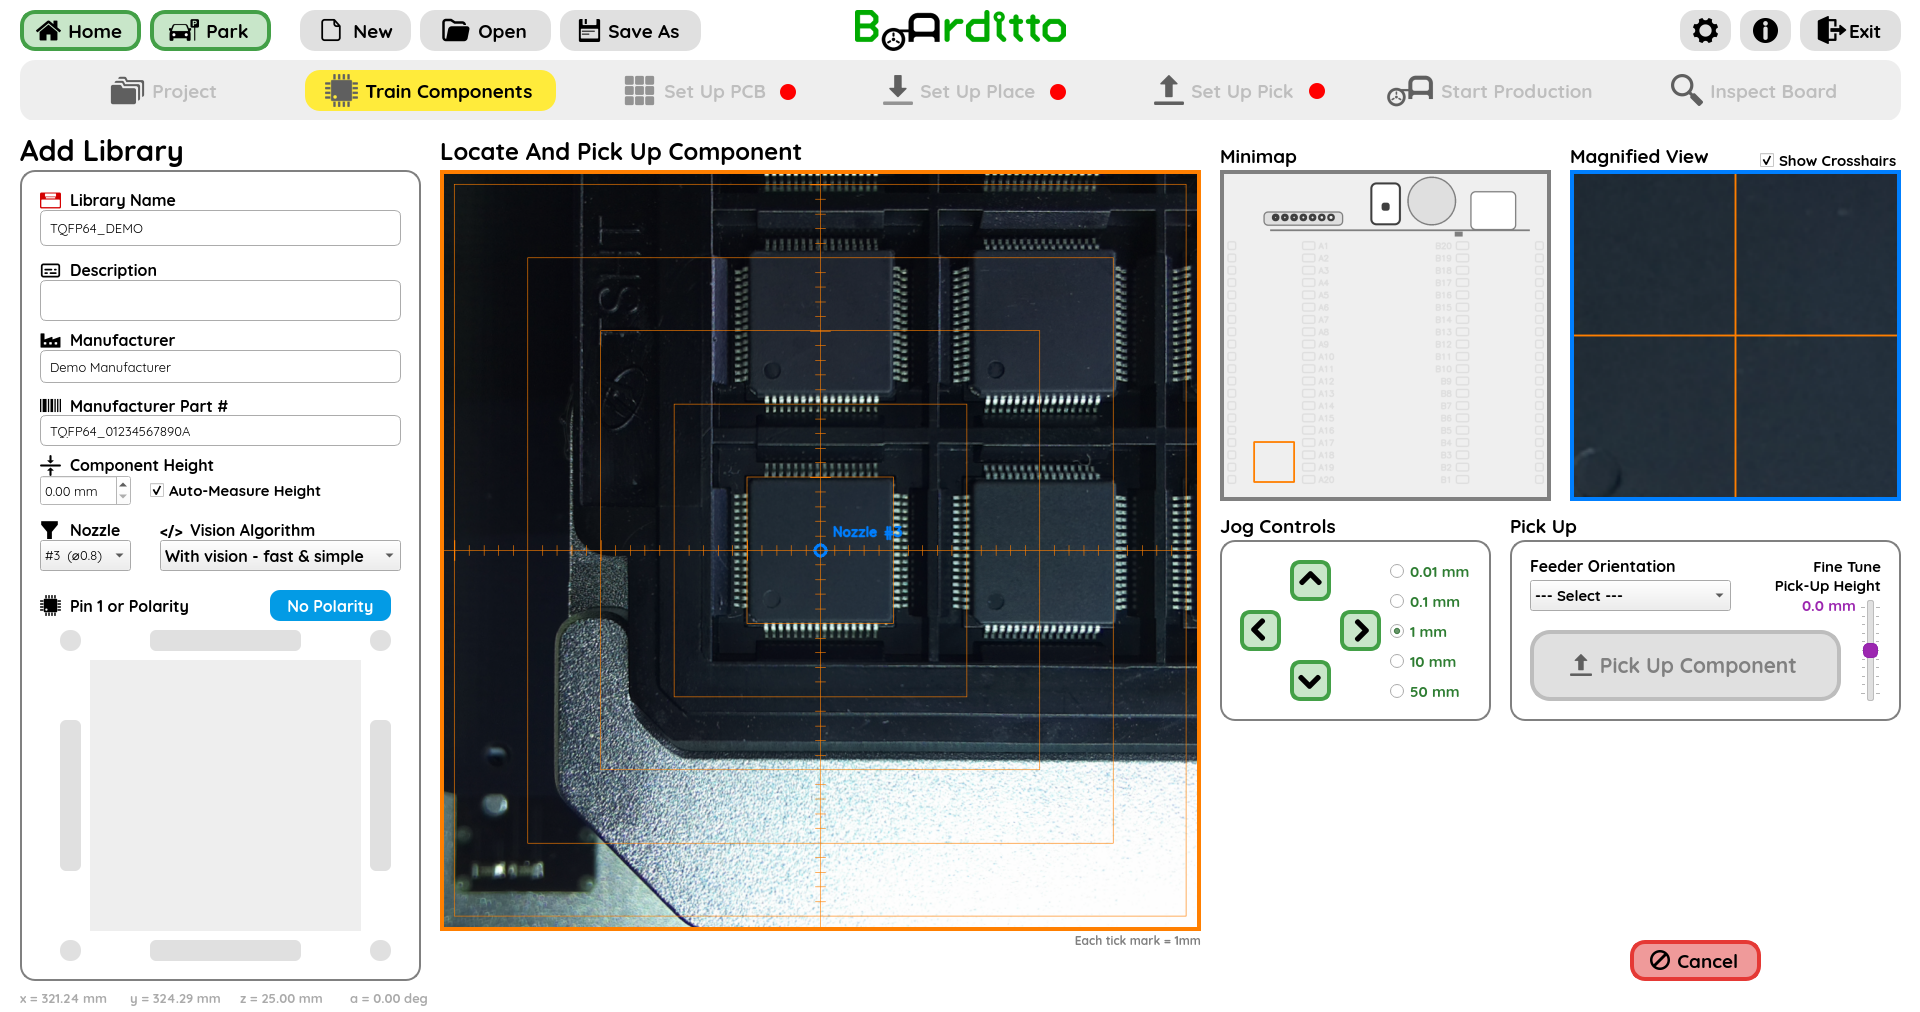
Position the component approximately in the center of the crosshairs on the screen.
Nozzle Size
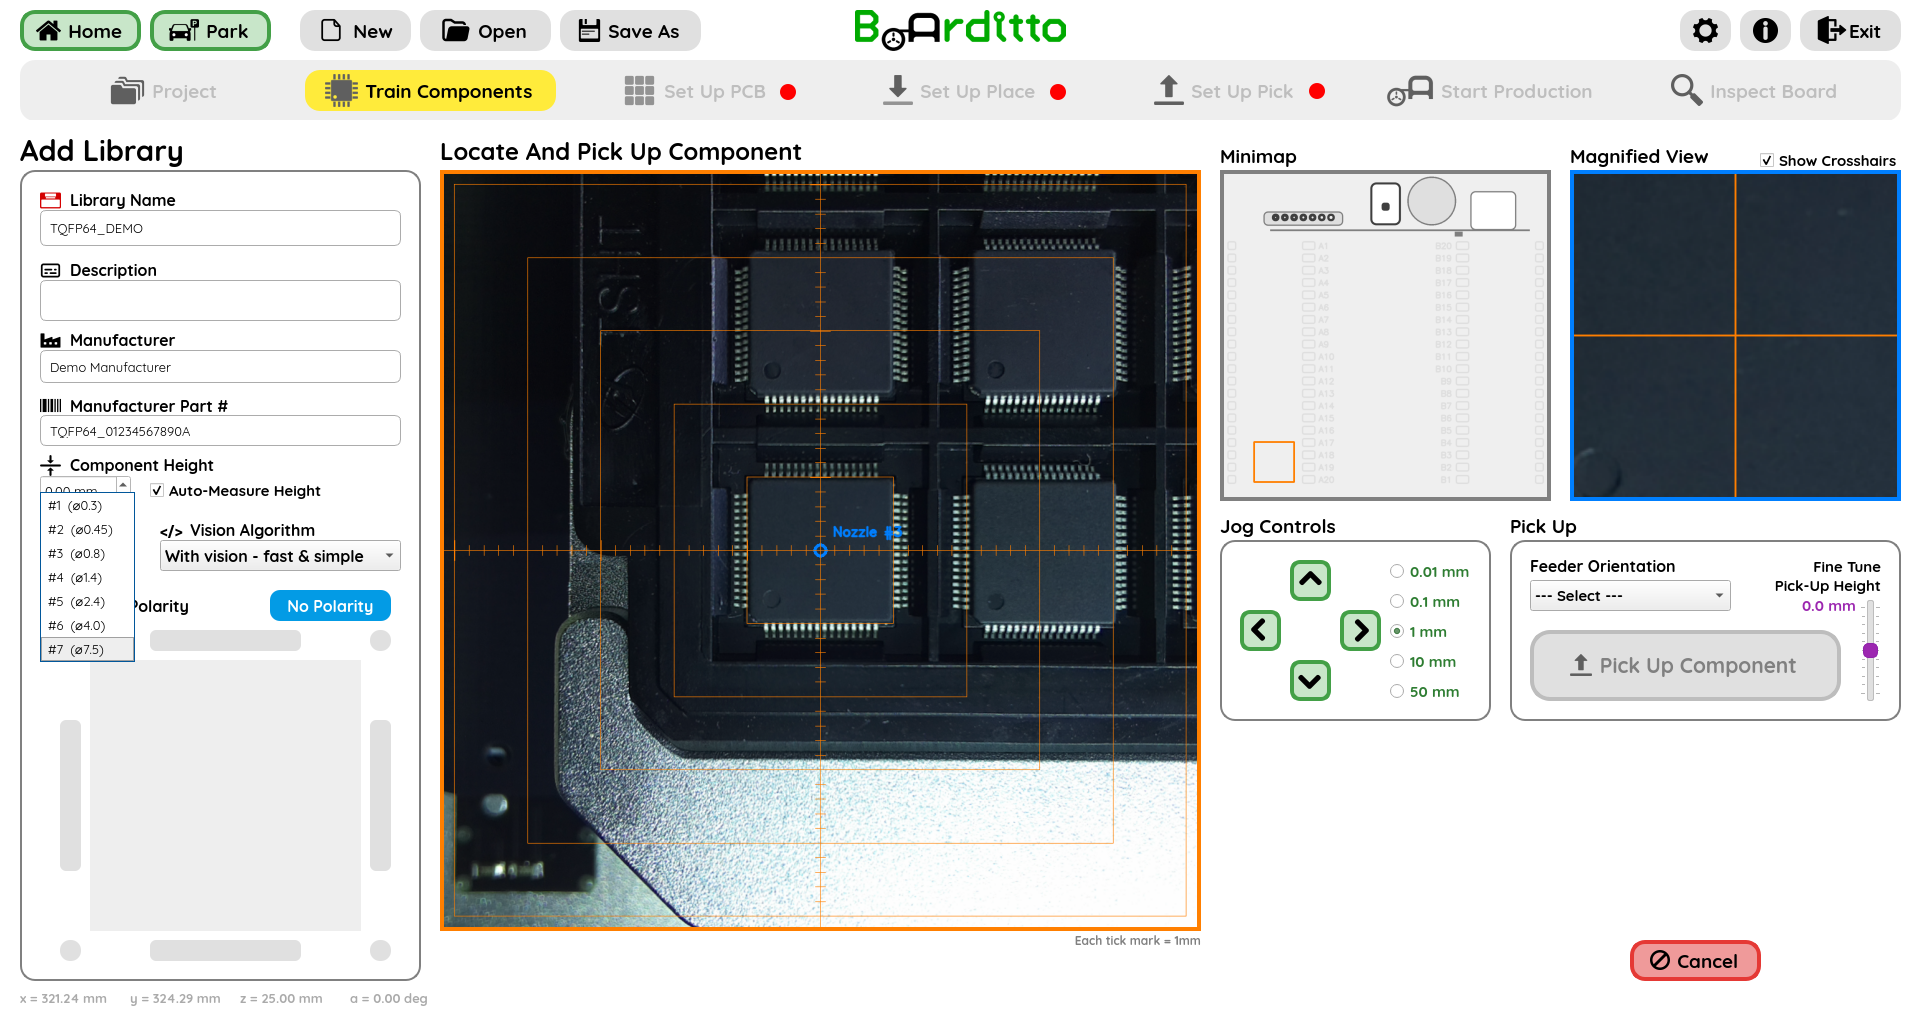
Observe the circle indicating nozzle size on the screen. Compare it to your component and select the appropriate diameter. Larger components generally require larger nozzles.
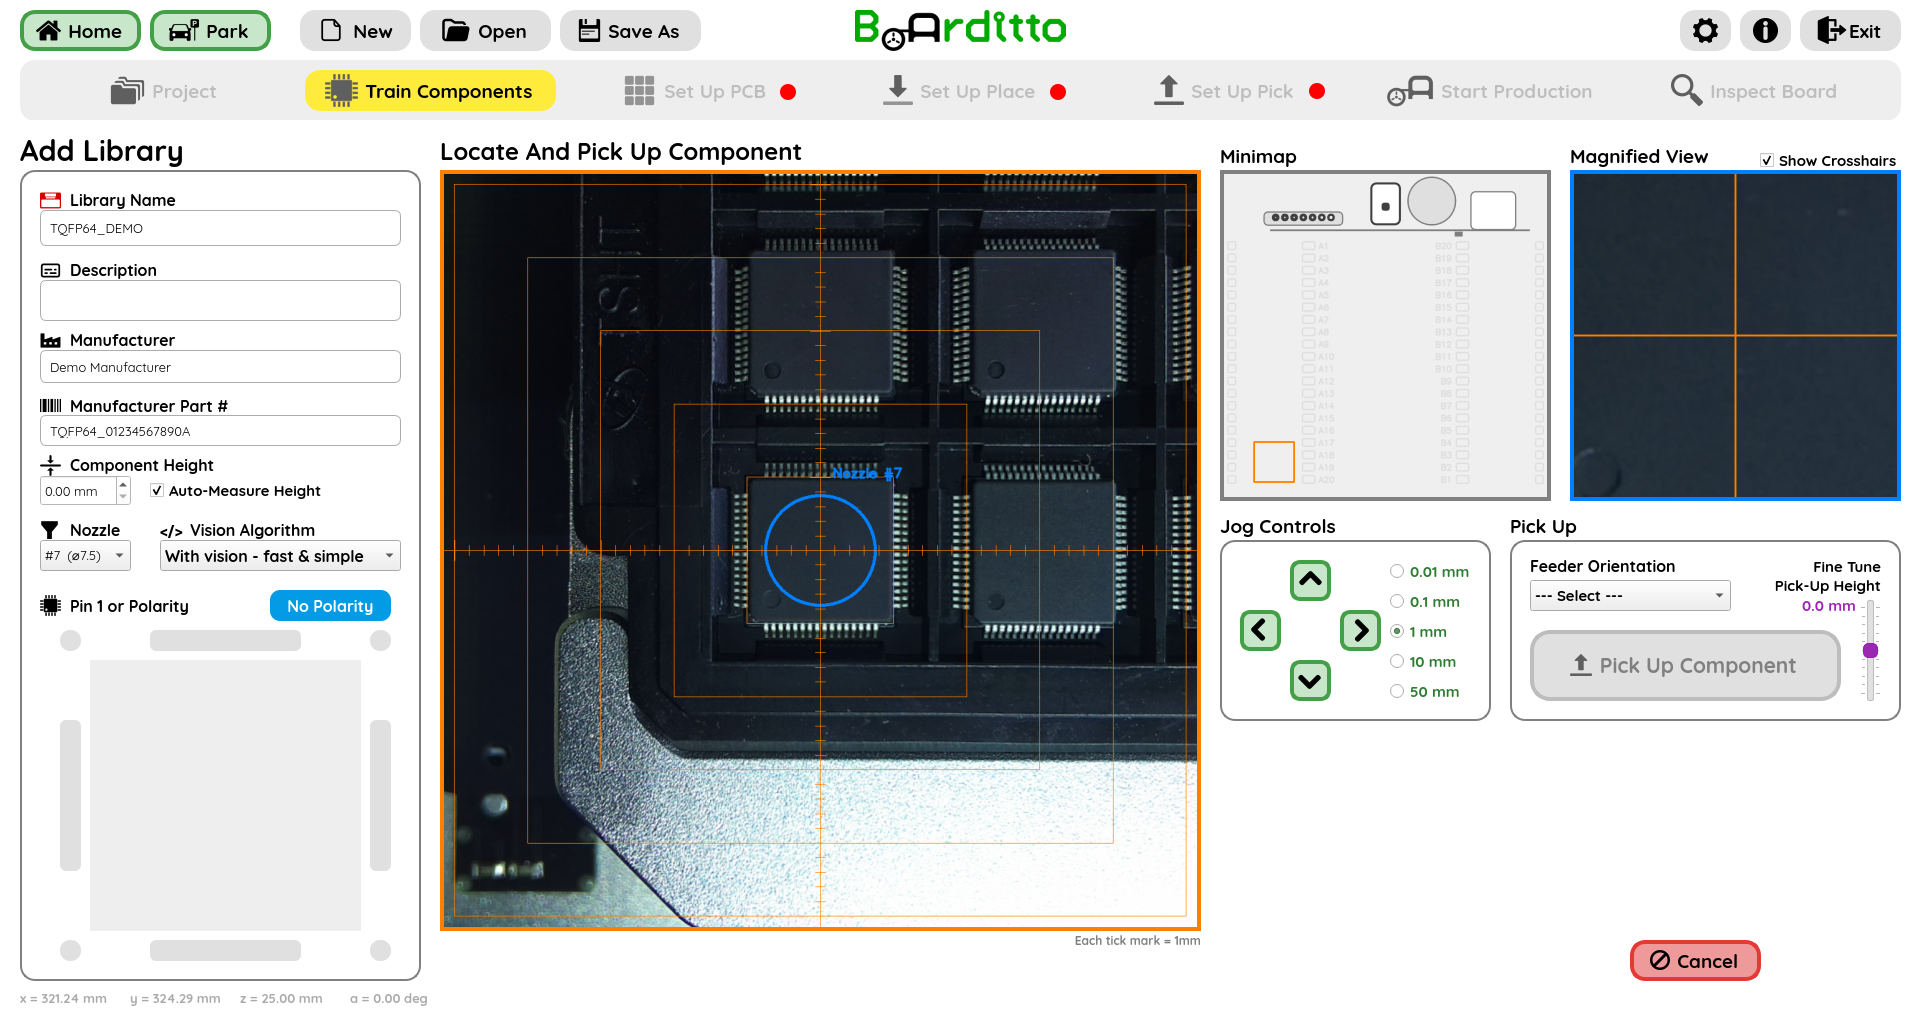
WARNING! Do not choose a nozzle that is wider than the component itself. For example, using the largest nozzle for a small 0201 resistor could cause it to be drawn into the air tube.
Vision Algorithm
Choose a vision algorithm based on the desired balance between processing speed and accuracy:
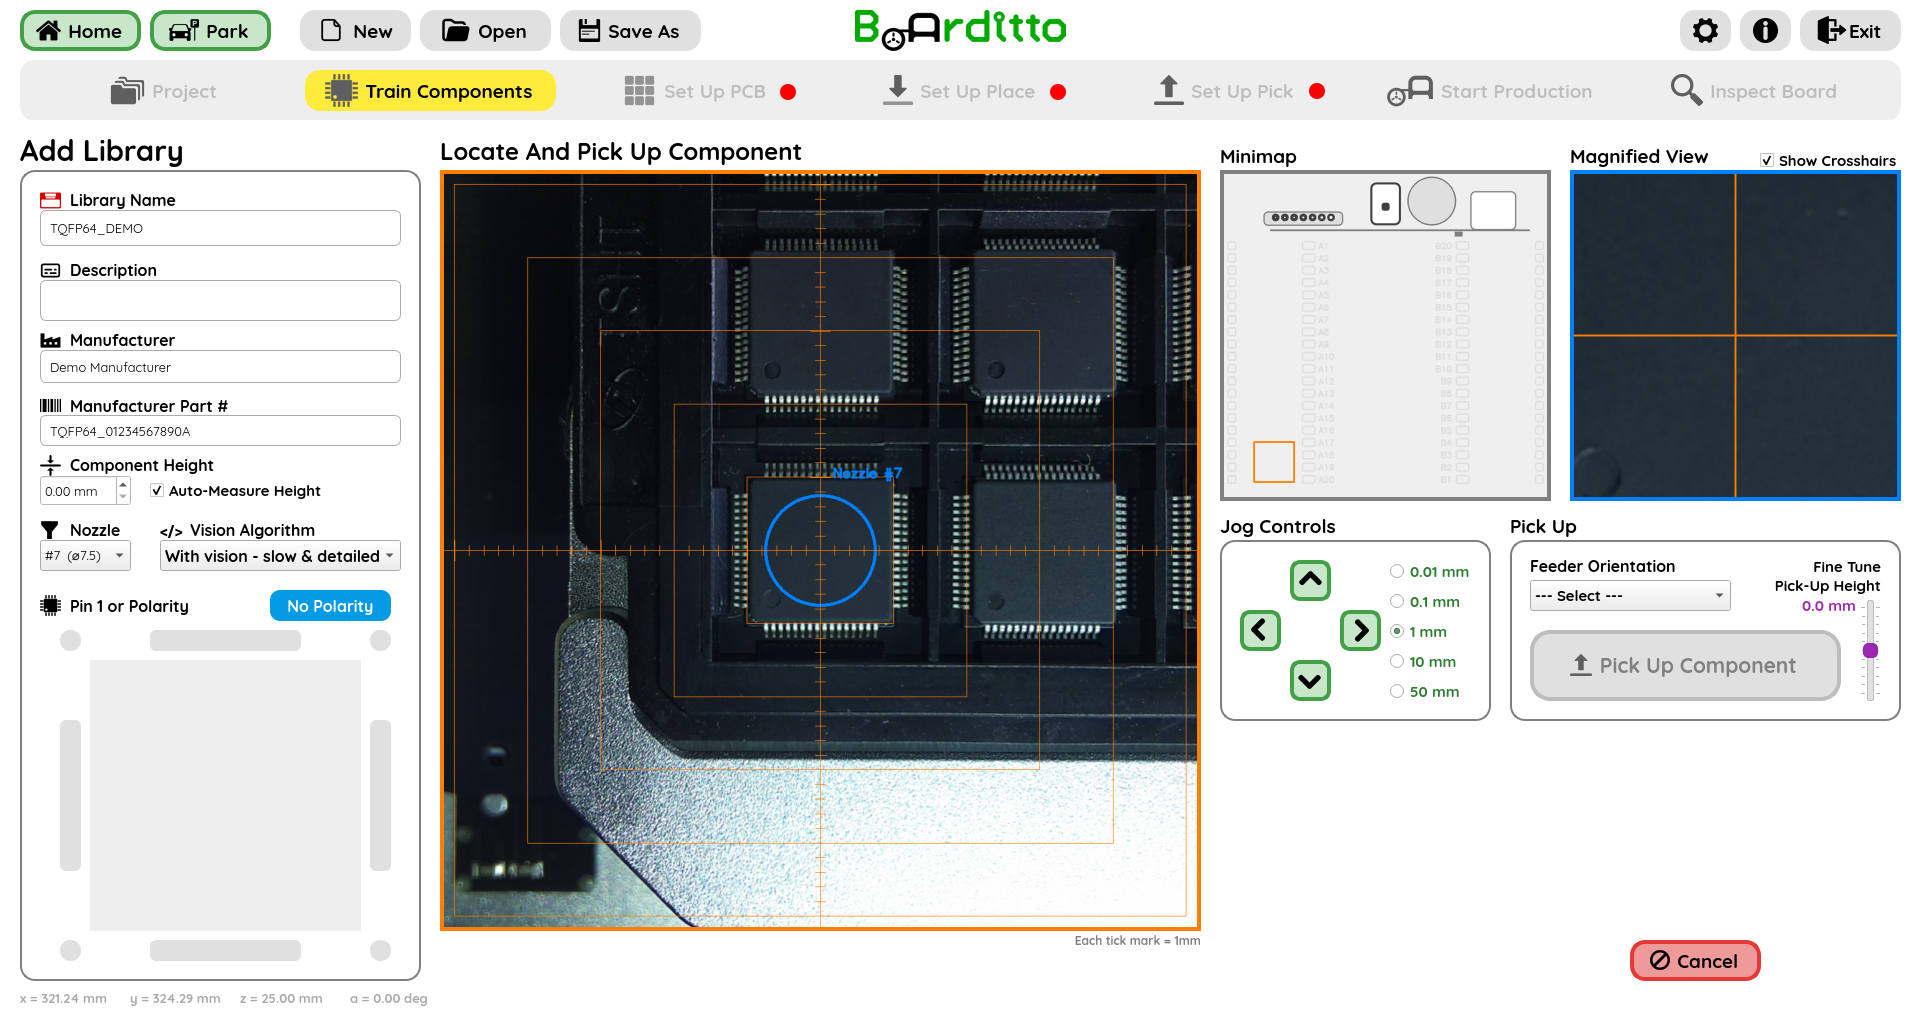
• No Vision: Fastest option, but suitable only for components with large pitch leads and are forgiving in terms of accuracy of component placement.
• With Vision – Fast & Simple: Provides a good compromise between speed and accuracy.
• With Vision – Slow & Detailed: Prioritizes accuracy—recommended for very small, fine-pitch, and high pin count components.
Component Pick-Up
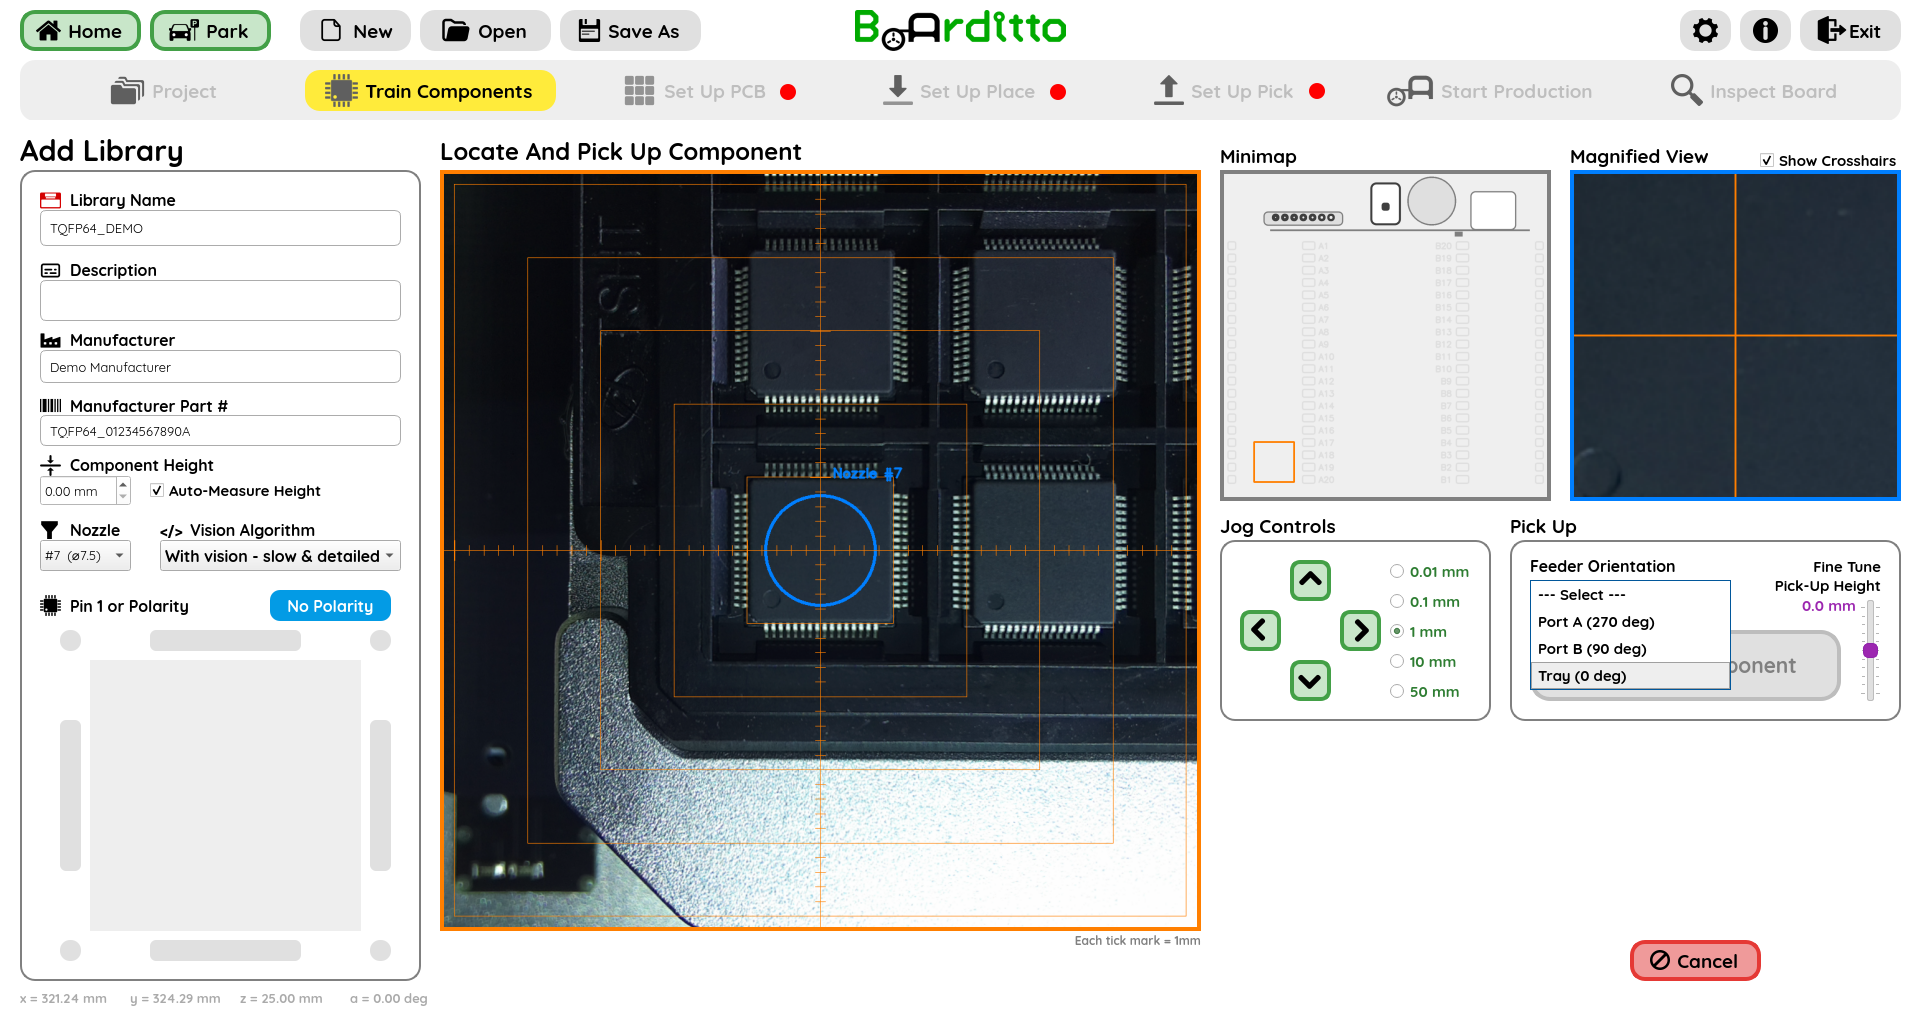
In the Pick Up menu, indicate whether the component is loaded in Feeder Dock “A”, Feeder Dock “B”, or onto a Tray Feeder by choosing an option from the “Feeder Orientation” drop-down list.
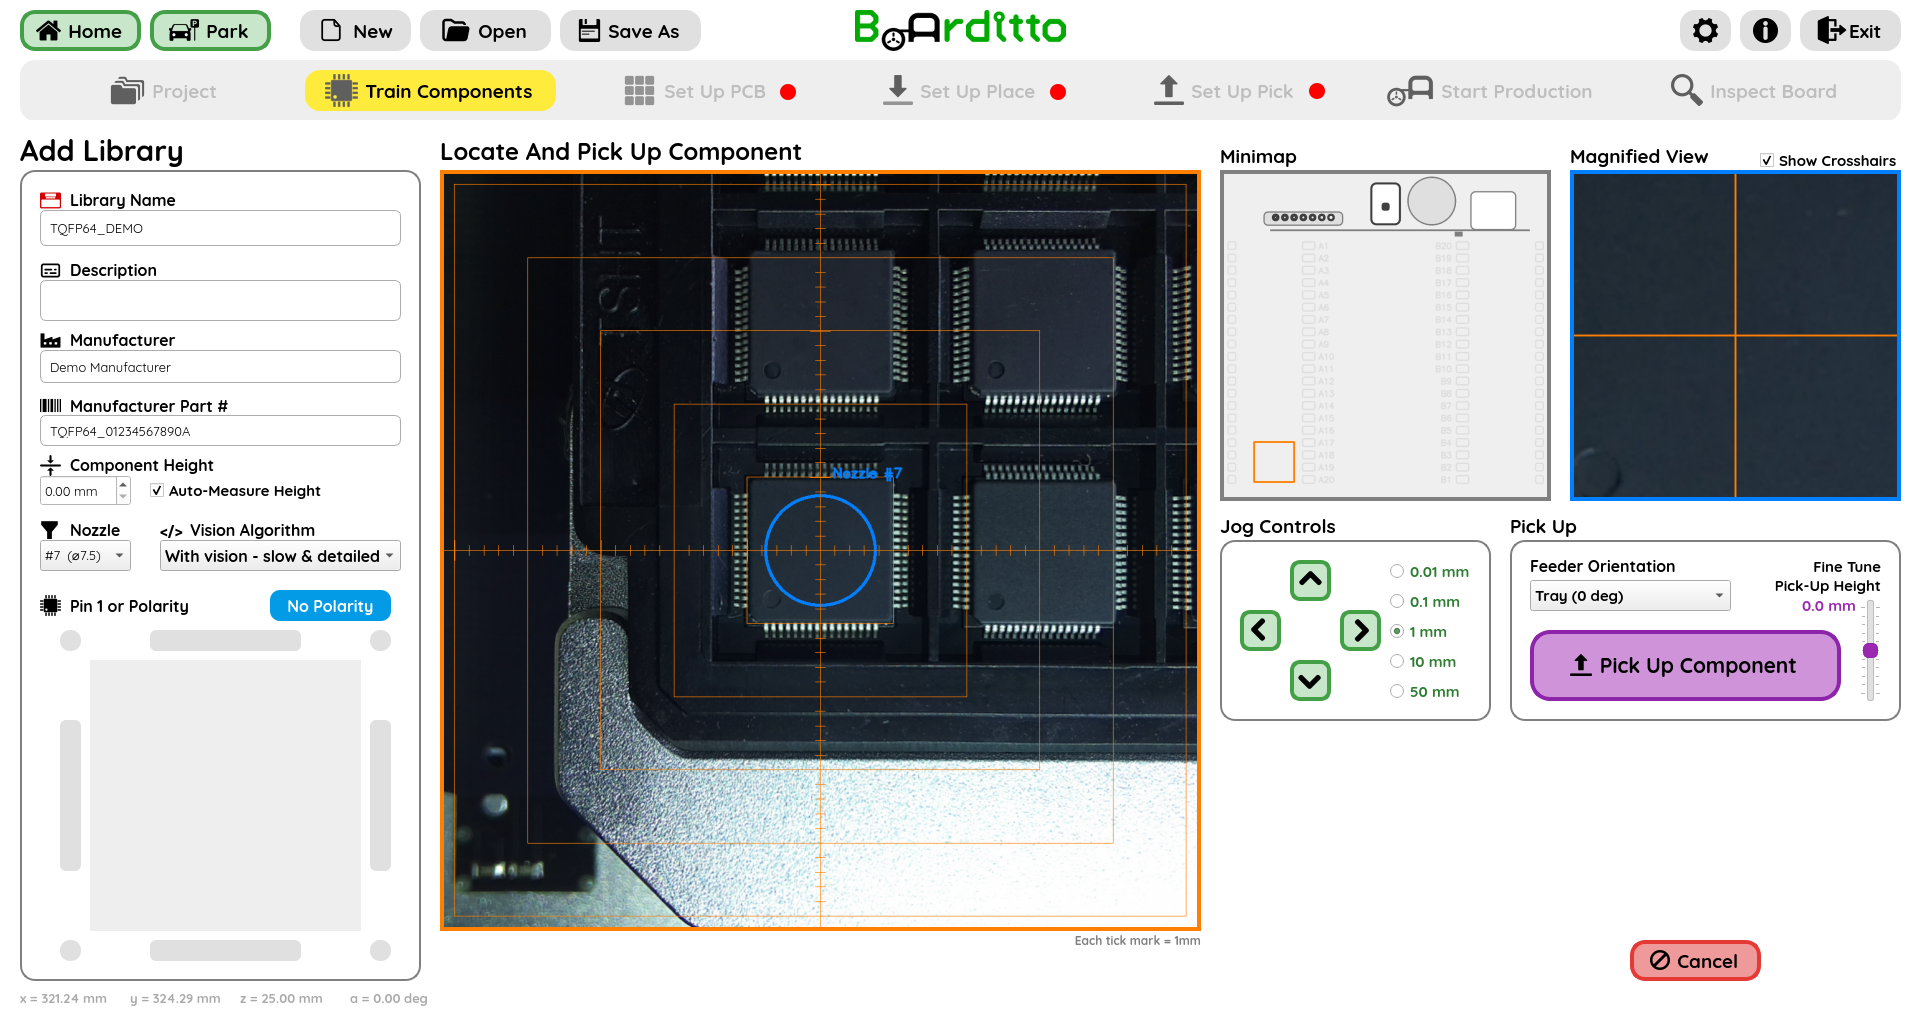
Click “Pick Up Component”.
The “Fine Tune Pick-Up Height” slider allows adjustment of the nozzle’s pick-up height, with a range of +/- 1.0mm.
• If the machine is unable to pick up the component due to an existing gap between it and the nozzle, lower the “Fine Tune Pick-Up Height” value slightly.
• If the nozzle pushes the component down excessively, increase the “Fine Tune Pick-Up Height” value slightly.
Centering and Alignment
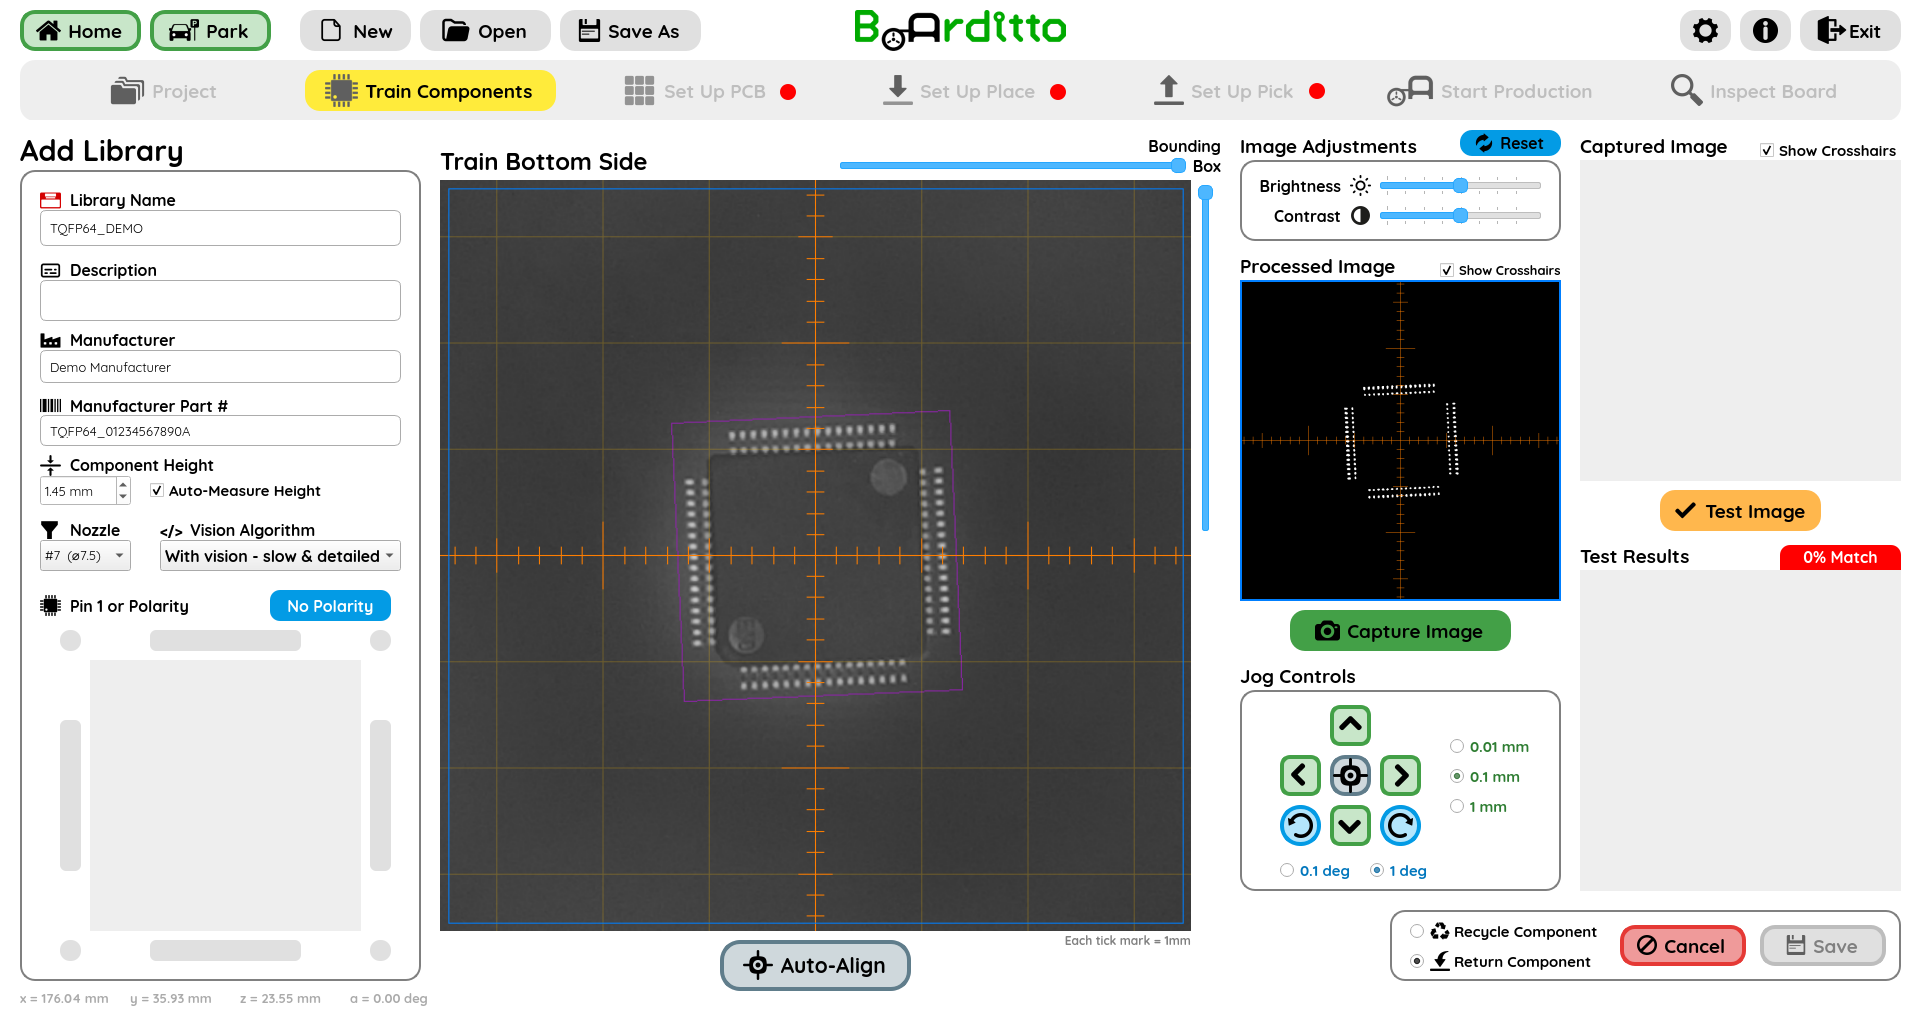
The objective is to establish a well-centered and well-aligned image for use as a reference during production.
Center and align the component with the crosshairs on the screen.
There are two options:
• Automated Alignment: Click the “Auto-Align” button to allow the machine to automatically adjust the bounding box, center, and align the component. Multiple clicks may be necessary for fine adjustments. You can click on this button more than once for fine-tuning. More than one click may be useful for fine-tuning.
• Manual Alignment:
◦ Move the machine head until the component appears centered.
◦ Adjust the nozzle’s angle until the component appears level.
◦ Use the sliders to adjust the size of the bounding box so that it wraps the component while leaving a small margin around it.
Tip: Use the tick marks on the screen as a visual guide during centering and alignment.
Tip: If necessary, adjust image brightness and contrast using the sliders in the “Image Adjustments” menu.
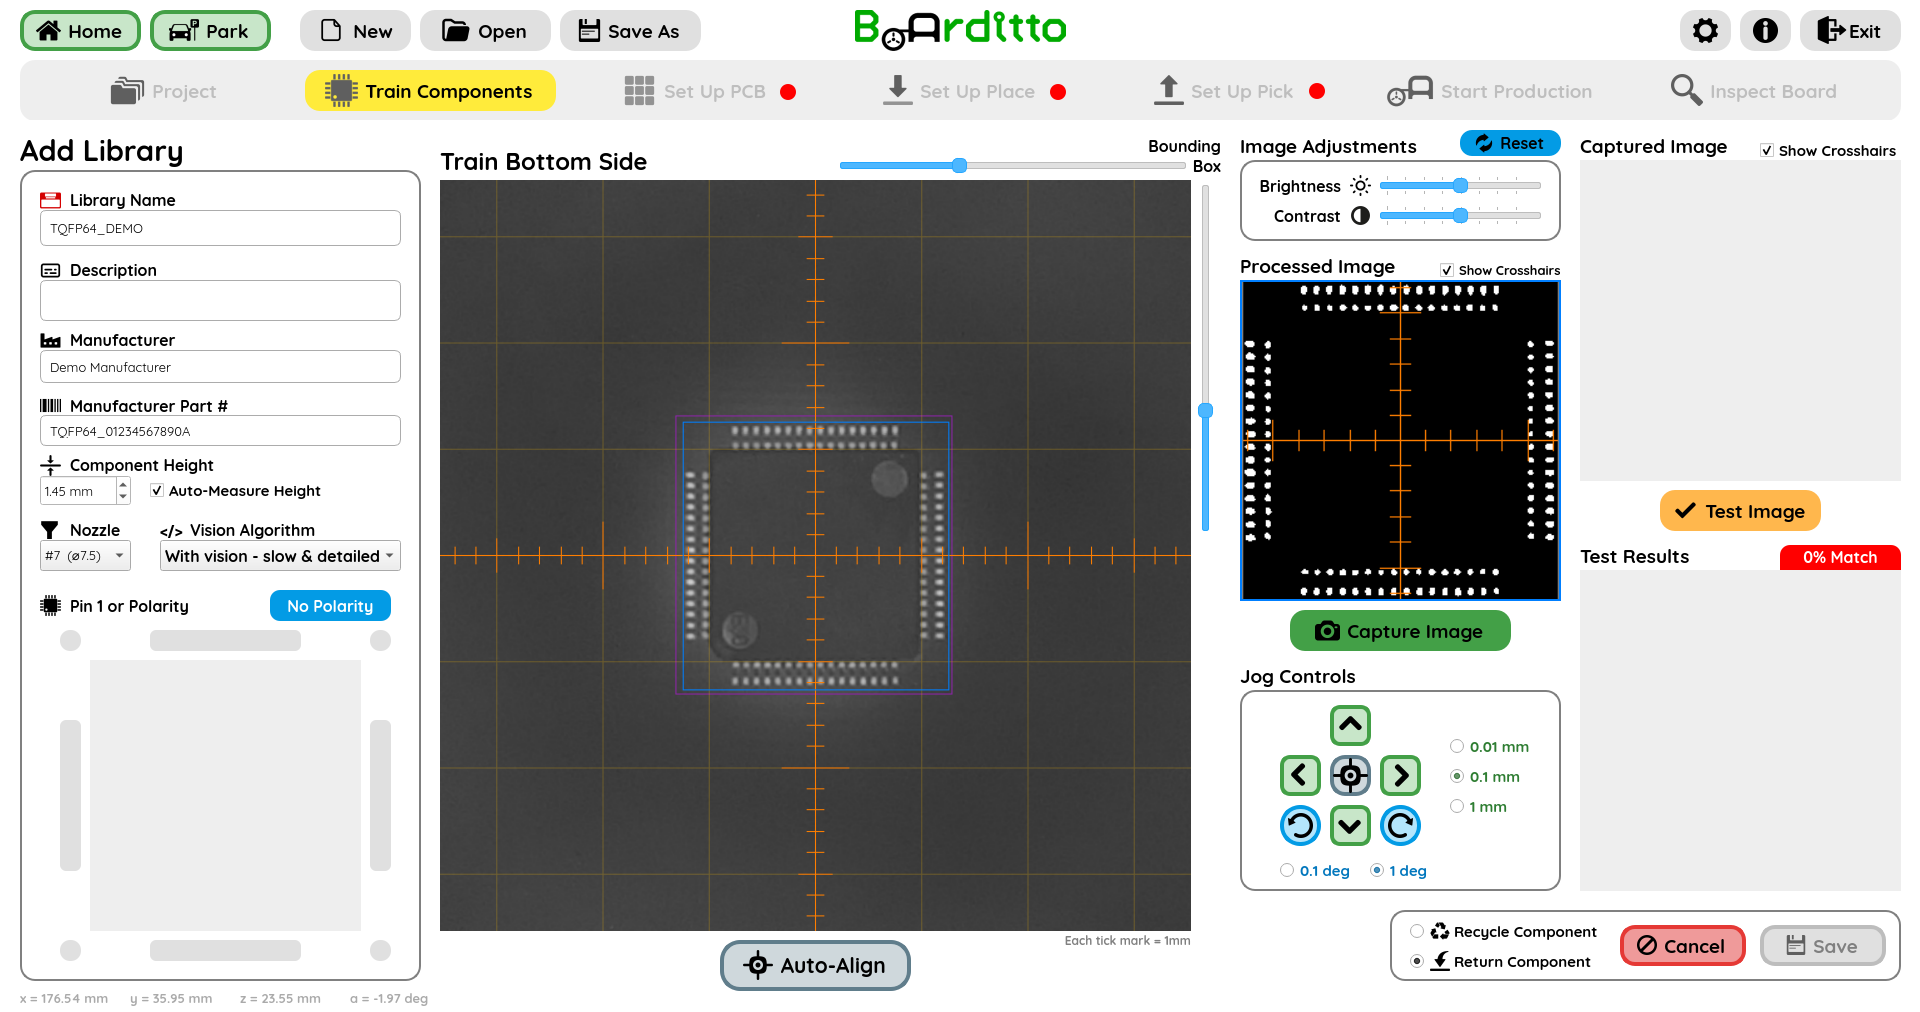
Review the displayed image. The following are examples of a poorly-trained image:
• is not centered nor aligned well enough
• has missing leads
• has broken features (example: asymmetry when the component is symmetric)
Once you are satisfied with the image, click “Capture Image”. If it does not meet your requirements, repeat the previous step and capture the image again.
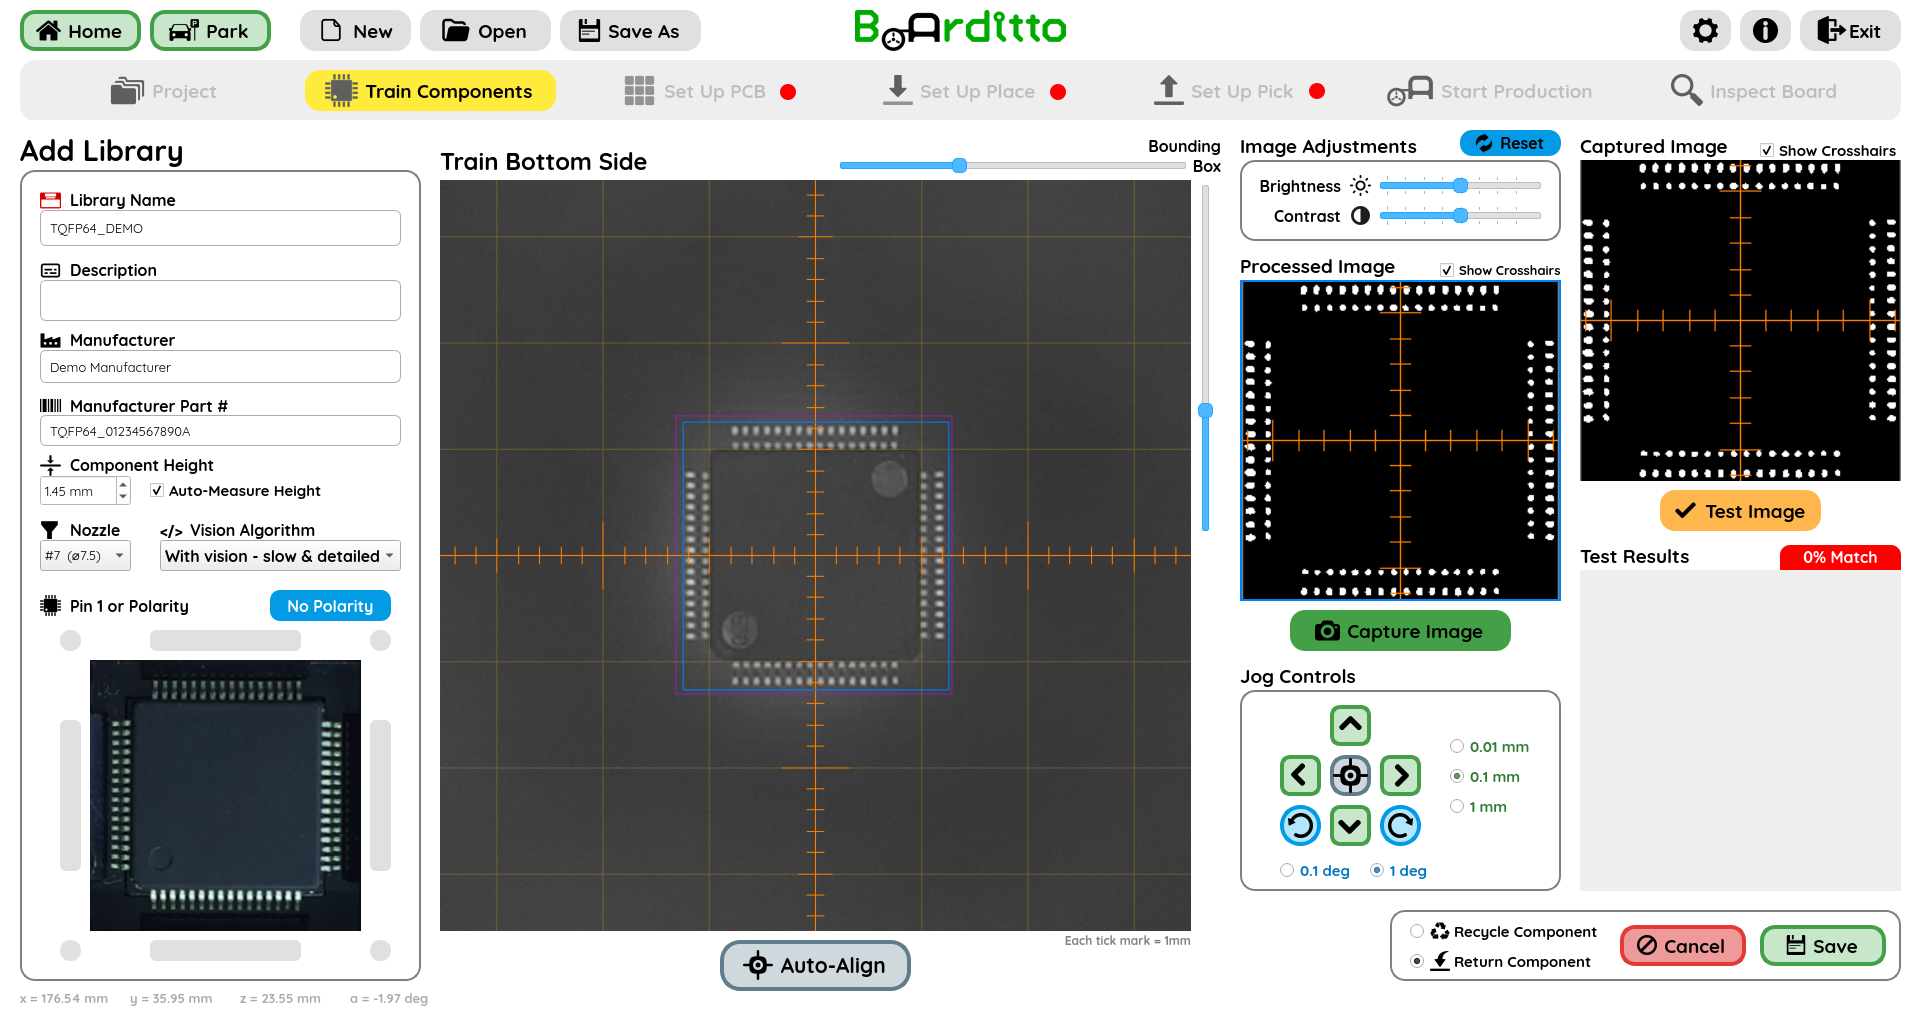
Click “Test Image”.
The “% Match” indicates the level of confidence the machine has of successfully finding the component using the bottom camera. During production, anything above or equal to 70% match will be accepted and placed onto the PCB. Anything below 70% will be rejected and dumped into the recycling bin for you to recover later on.
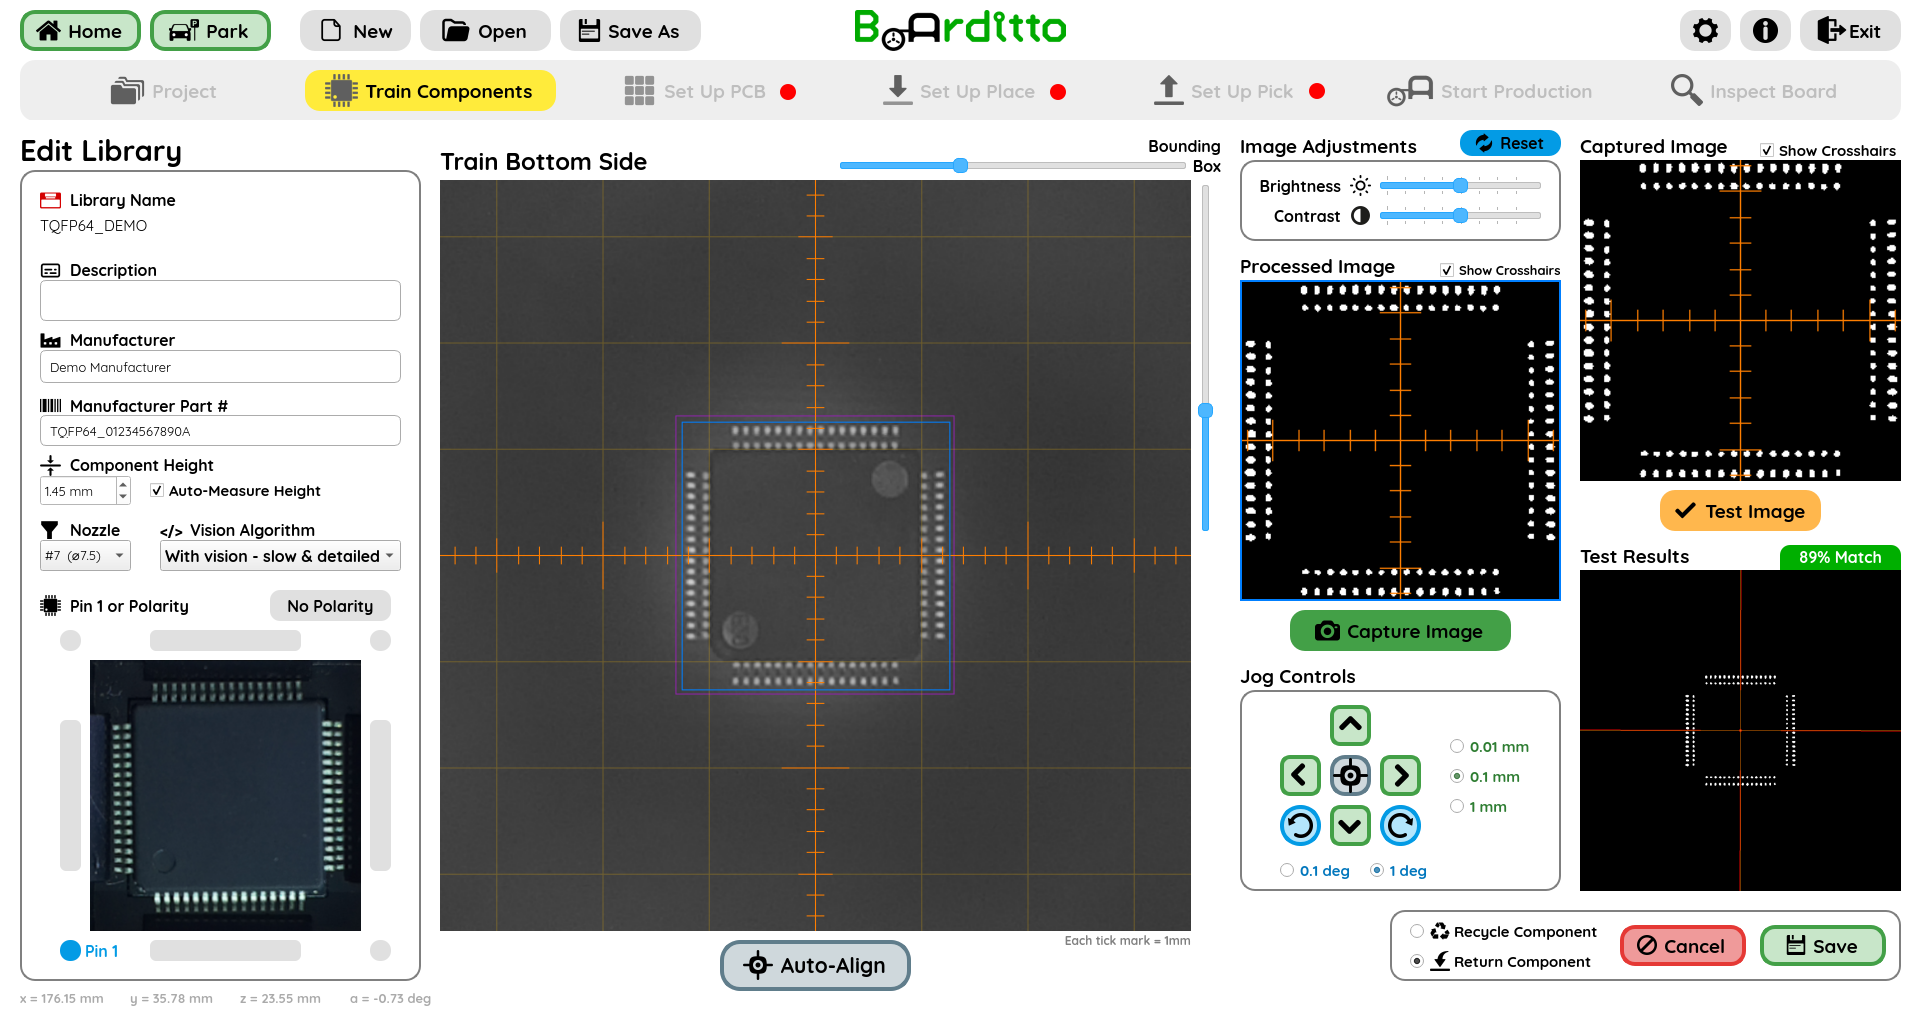
Specify Pin 1 location, if applicable, by selecting the corresponding circle.
For components with polarity, indicate its position by selecting the corresponding bar. If the component lacks polarity, select “No Polarity”.
Click “Save” to store the image in the library. The machine will return the component to its original location. You can also select the “Recycle Component” option before saving to place it in the recycling bin instead.
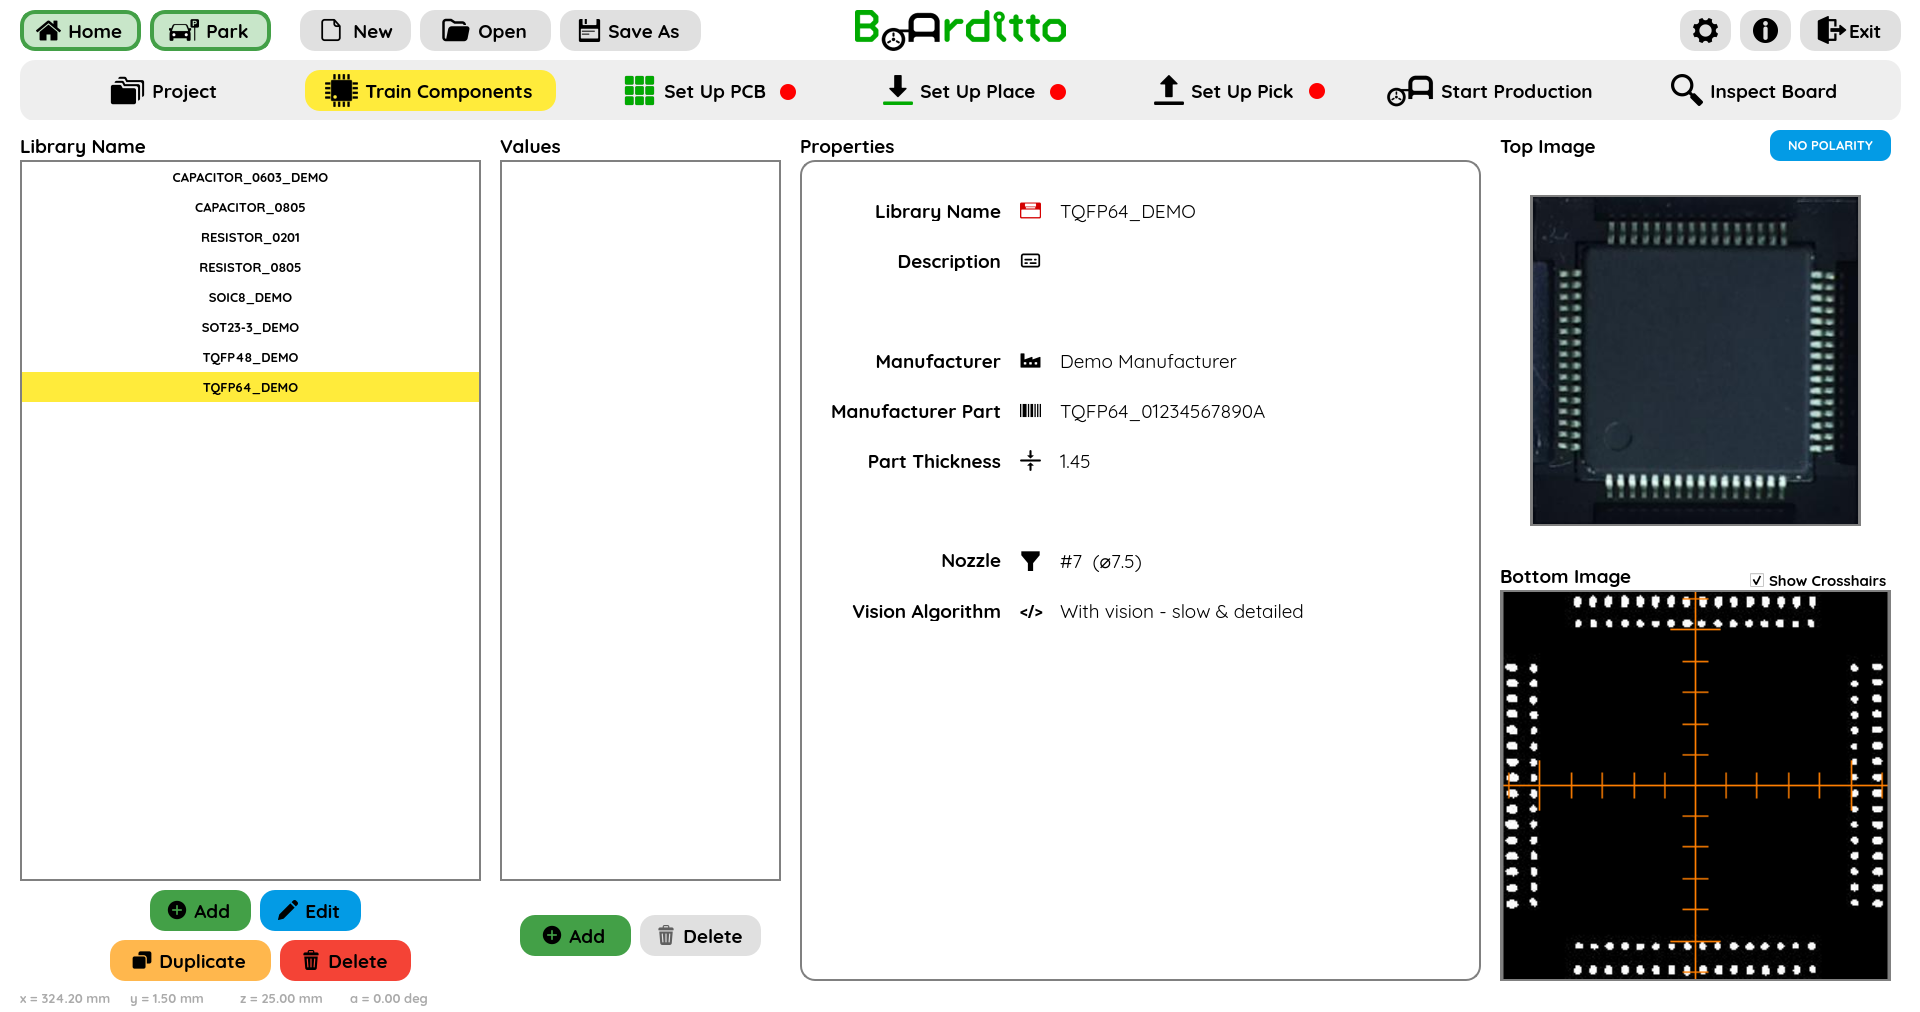
A new component will now be listed within the Library Name list.
Component Values
(Optional)
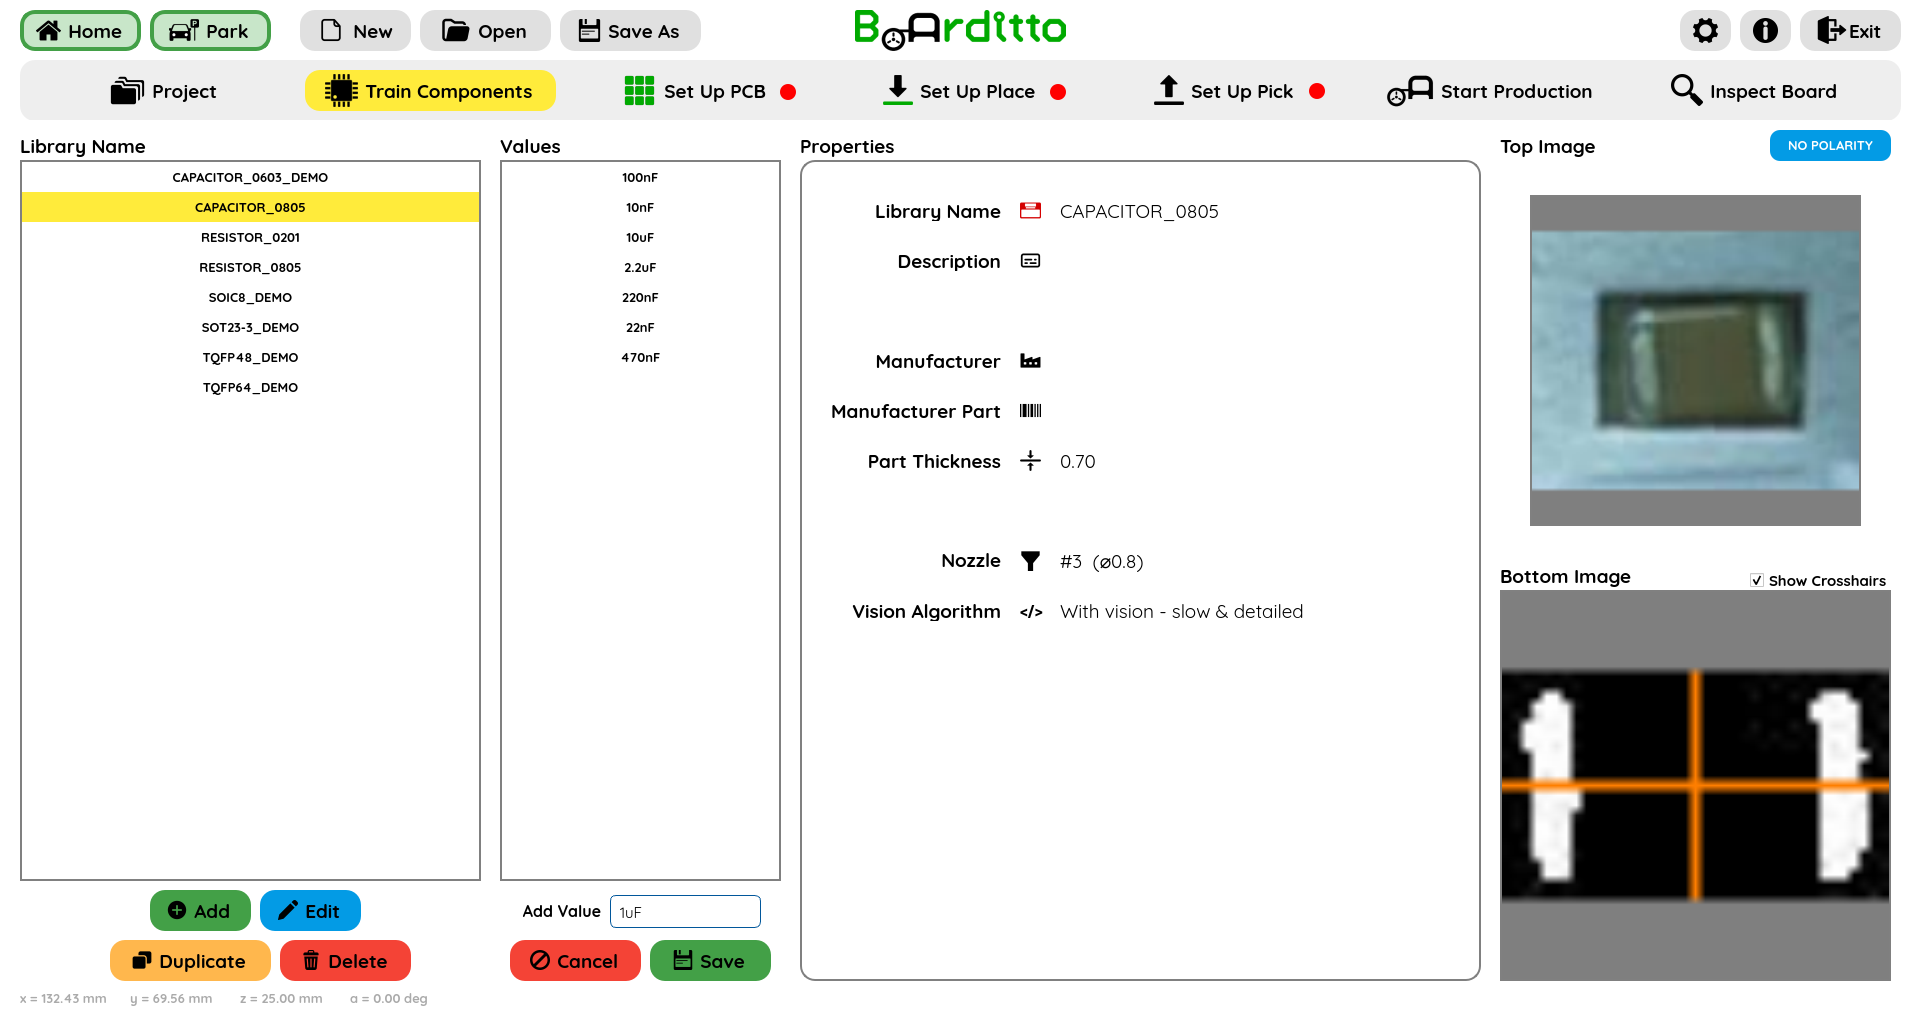
The “Values” field is useful for managing components that have the same package type but different values. For example, a shared “Resistor 0603” library can be used for values such as 220ohm, 1k, 10k, etc. To add a new value to a specific component library, select the library from the Library Name list and click the “Add” button below the “Values” list.
WARNING! While grouping similar components can be convenient, slight differences in height, lead shape, reflectivity, or size between packages of the same name (e.g., Capacitors 0805) may cause the vision system to reject them. If the match percentage falls below the 70% threshold, this can cause the machine to place the component from an incorrect nozzle height (for example, releasing the component mid-air), which may result in misalignment in component placement. If you are uncertain, it is best to train a separate library for each package type instead of using shared values.
Next: Set Up PCB