
Set Up PCB
Last updated: May 8, 2020
1. Open the machine’s lid, insert your PCB into the spring-loaded PCB holder and close the lid. After creating or opening a job, click on “Set Up PCB”.

2. For this tutorial, we’ll be using the sample board included with the machine, “Boarditto Demo Board #1“. Input the dimensions of your board. Click “Learn Panel Fiducials“.

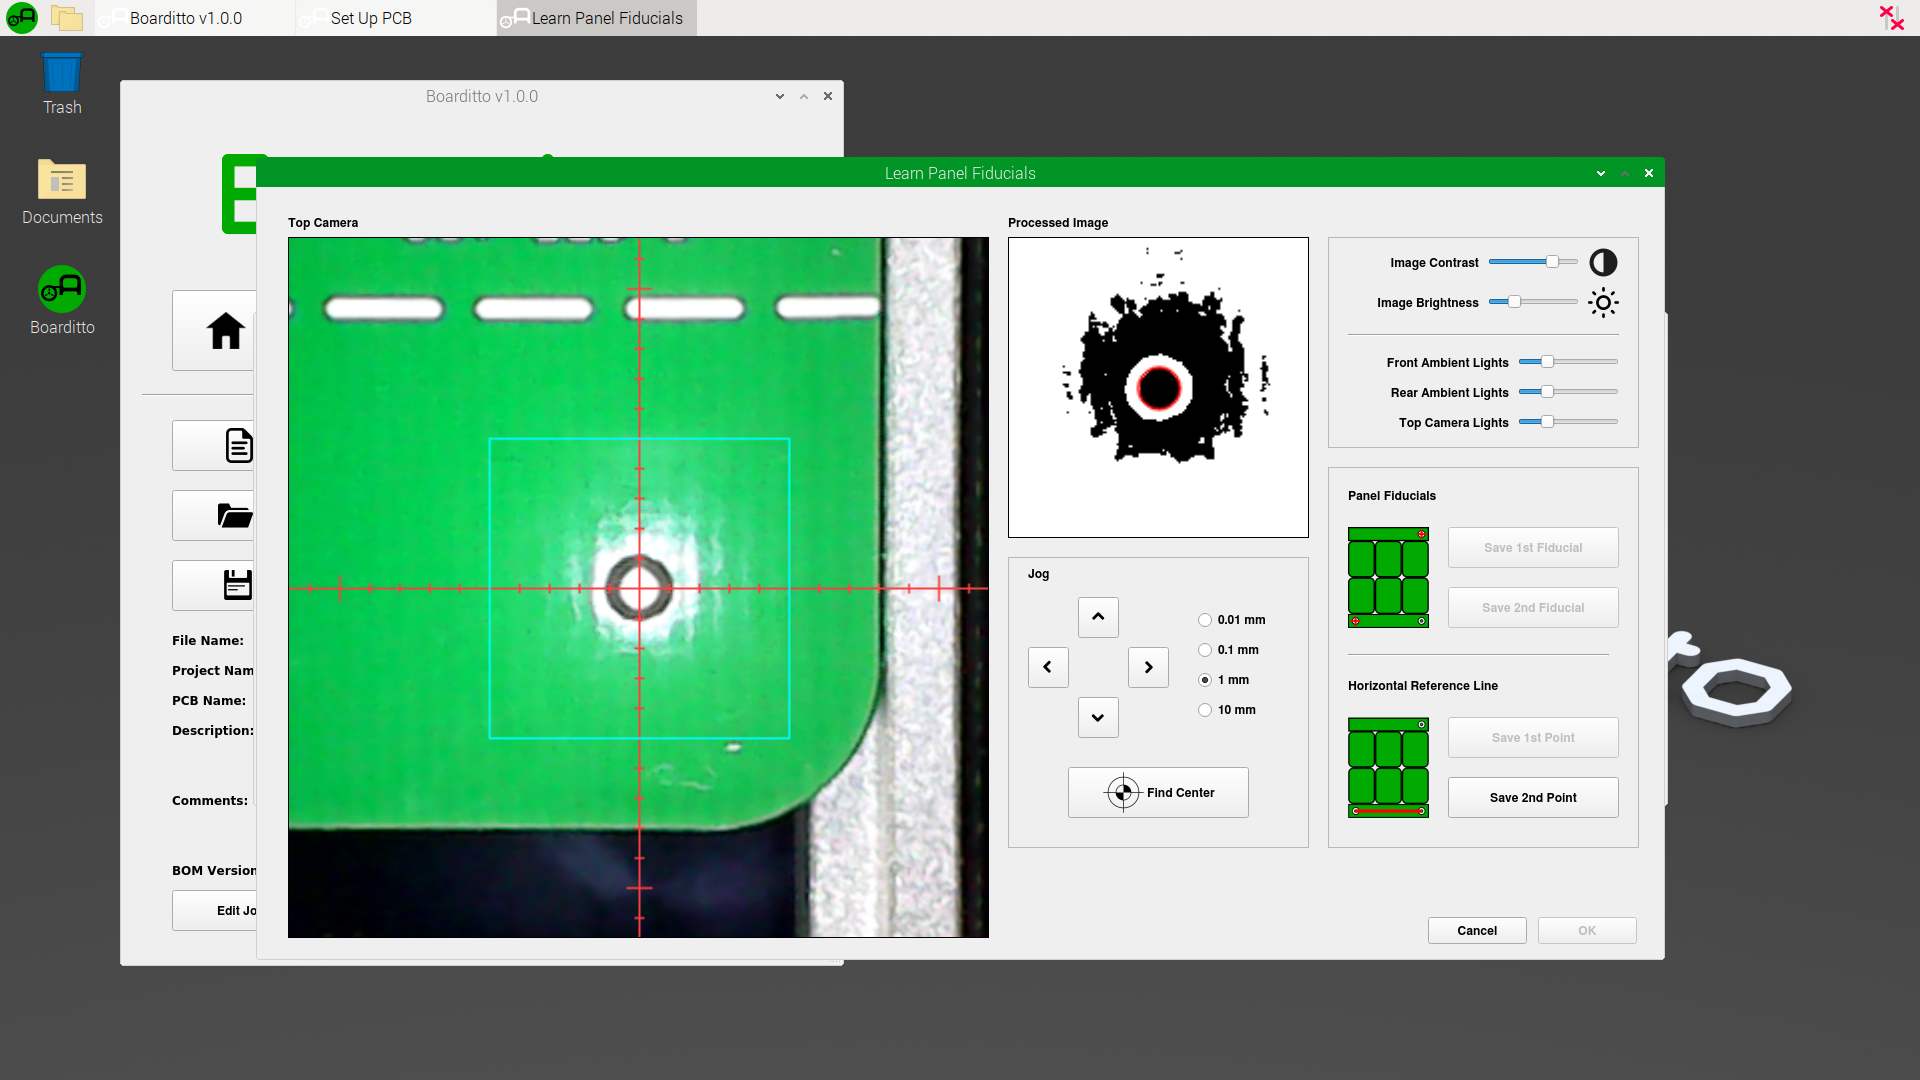
3. Jog the crosshairs until your 1st fiducial is located within the blue box. The red text “No Fiducial Detected” in the “Processed Image” viewport should disappear.
Tip: if the fiducial can’t be detected, adjust the Contrast and Brightness settings until you see a black dot with a red circle around it in the “Processed Image” viewport.
Tip: you can also use the arrow keys on your keyboard to jog.

4. Click “Find Center” so that the software can automatically find the center of the fiducial for you. Click “Save 1st Fiducial”.
Tip: you may need to click “Find Center” a few times before the crosshairs lands exactly on the center of the fiducial.

5. Repeat the above for your 2nd fiducial and click “Save 2nd Fiducial”.

6. Save the fiducials for the Horizontal Reference Line of your PCB. We'll be using the bottom left and bottom right fiducials of “Boarditto Demo Board #1“ for reference. This horizontal reference line allows the machine to calculate the misalignment angle of your PCB mounted on the PCB holder. Find the center of the 1st fiducial of the Horizontal Reference Line and click “Save 1st Point”.

7. Find the center of the 2nd fiducial of the Horizontal Reference Line. Click “Save 2nd Point” and “OK”.
8. Click “Learn Board Reference Points”.

9. Find the center of the 1st fiducial and click “Save 1st Fiducial”.
Note: if your PCB is not panelized, the pairs of fiducials for Panel Fiducials and Board Fiducials will be the same.
10. Find the center of the 2nd fiducial. Click “Save 2nd Fiducial” and “OK”.


The steps above are perfect for single-board prototyping. If instead, you’re working with an array of multiple boards in one panel (common for small batch or mass production), see Panelization.
Optional: Panelization